
In Day 4, we went over some best practices for personalizing with tags. Today, we’ll shift to custom fields.
First, it’s important to learn the difference between tags and custom fields.
-
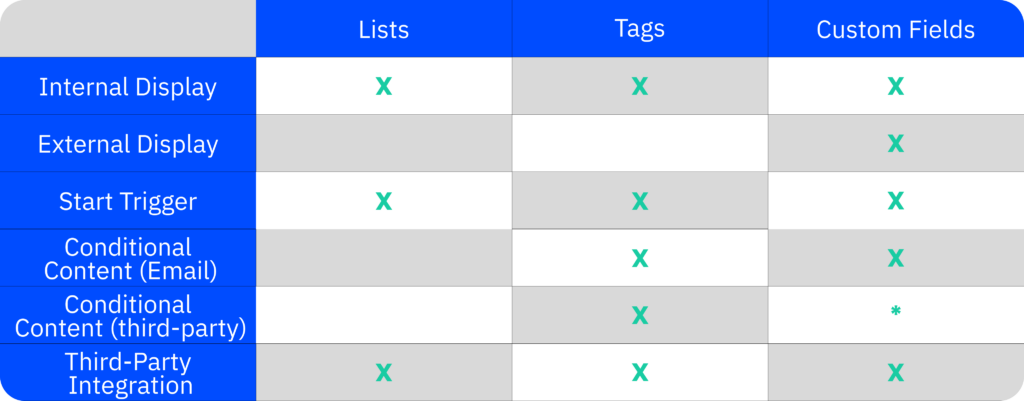
Tags are more flexible, while custom fields are structured to store specific data points about your contact.
-
Tags can be added or removed frequently based on actions and behaviors, where custom fields provide consistent, detailed data for personalization and segmentation.
-
Tags are visible only to ActiveCampaign users, while custom fields can be displayed internally and externally. (That is, the data contacts submit by filling out forms is sorted into custom fields and can be displayed in your messages to them.)
Use tags to label actions, behavior, interest, engagement, or status.
Use custom fields for subscriber information such as product/company name, email, order #, birthdates, frequency of purchase, currency, etc.
Remember, custom fields can do everything tags can do, and sometimes more.
Day 5 - Task of the Day:
Now that you have a good understanding of custom fields, try creating one:
- Click “Contacts” > “Fields”
- Make sure you’re in the “Contacts” tab if you wish to create a contact custom field.
- Click the blue “Add Field” button in the top right corner.
- Type the name of your custom field. For this example, let’s add “Last Engaged Date.”
- Select the Group it will belong to (Groups are used to segment fields on contact records).
- Choose the Field Type.
- Click the “Add” button.
Note: As with many things in ActiveCampaign, you can access the different functionalities from several different places. Custom contact fields can also be created directly in the ActiveCampaign form editor, on contacts’ profile records, and via the Import contacts page.