With the decline of third-party cookies and the growing expectations of online consumers, online businesses must develop fresh strategies for gathering first-party data.
One way to capture that data is to have the customer fill out a form in exchange for an incentive, like a coupon.
91% of online shoppers are searching for and using coupons already, so you can bet they’ll be pretty willing to share. All you have to do, is make it happen with our Coupon Block!
Our Coupon Block seamlessly integrates with email campaigns, enabling automated coupon generation and delivery. Let’s walk through how you can set this up to boost sales, increase customer loyalty, and gather valuable first-party data for personalized marketing efforts in our Task of the Day.
Day 13 - Task of the Day:
You can either send coupon codes using custom fields and personalization tags for non-integrated stores, or with our Coupon Block for integrated stores. We’re going to assume you have your store integrated for this exercise. If you do not, please follow these steps to send coupon codes without an integration.
- Go to Campaigns, create or edit an existing Campaign, and click into to the email designer.
- From the Campaign Designer, drag the “Coupon” block to your campaign layout.
- Click into the block to reveal the options on the right pane.
- Click the “Select a store” dropdown and choose a store. Additional options will load in the right pane, where you can take the following actions:
Select an existing coupon
- In the side pane, click the “Select coupon” dropdown.
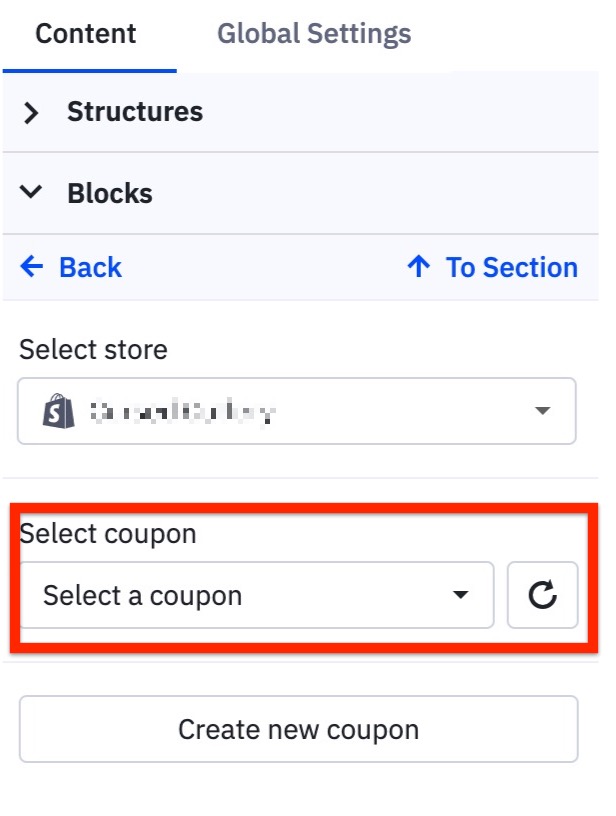
- Click the coupon you want to use. The coupon code will populate in the Campaign Designer.
- To Edit: Click the “Edit coupon” hyperlink.
Create a new coupon
- From the side pane, click the “Create new coupon” button.
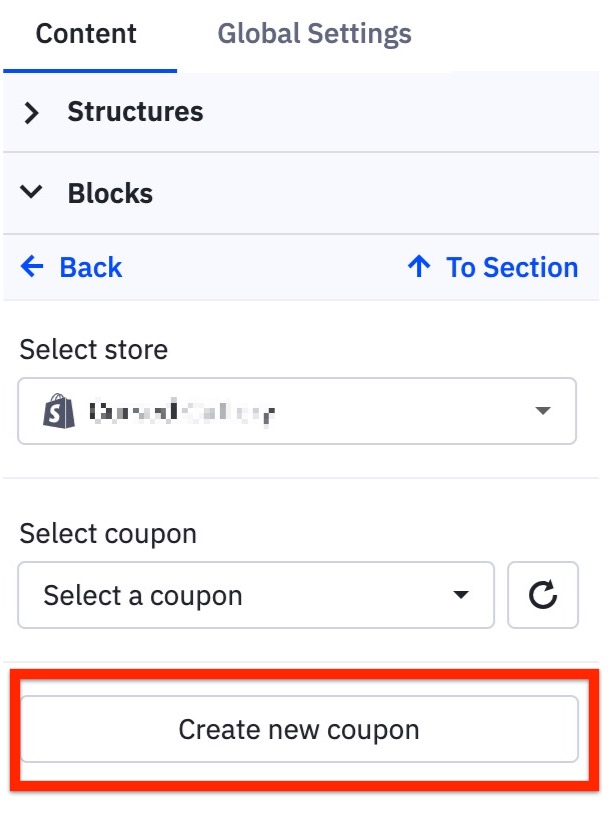
- A “Create a Coupon” modal will appear.
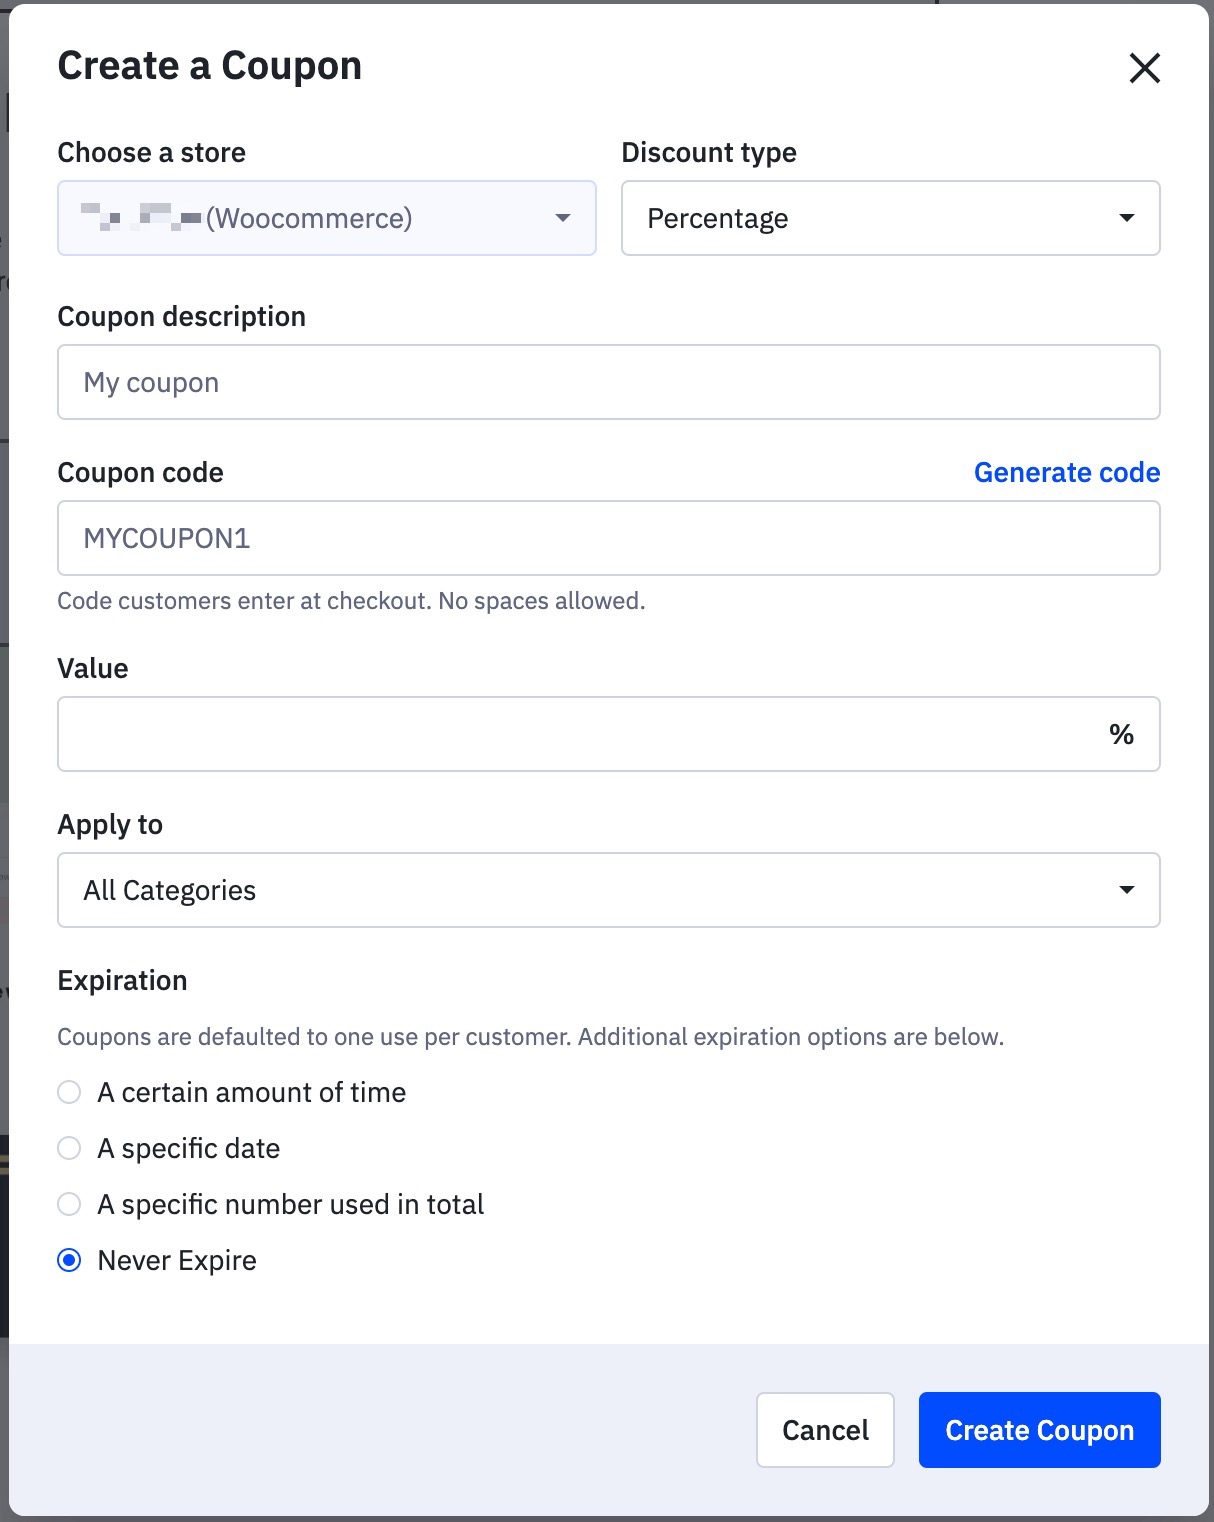
- Click the “Discount type” dropdown and choose a coupon type.
- WooCommerce only: Type in a summary of your coupon in the “Coupon description” field.
- Type in your desired Coupon code or click “Generate code” to create the code contacts will use.
NOTE: Shopify coupons are case-sensitive.
- Optional: Click the “Value” dropdown and choose a value for your discount type. This option may appear based on your “Discount Type.”
- Click the “Apply to” dropdown to choose what the coupon will apply to. Note that other configuration options may appear based on your “Apply to” choice; do not leave these blank.
- Choose an “Expiration” option. You cannot change the default option from one coupon per customer. The Expiration options seen here are to be used in addition to the default option.
- Click “Create Coupon.”
- To Edit: Click the “Edit coupon” hyperlink.